Oreo Icebox Cake

Oreo Icebox Cake is one of those blissfully easy desserts that makes you feel like a superstar baker, even if you’re just whipping it together in your kitchen. This no-bake treat features layers of creamy, rich whipped goodness combined with the delightful crunch of Oreo cookies. And while it’s undeniably indulgent, it’s surprisingly simple, making it a perfect choice for novice bakers and those who just want dessert without the fuss.
Table of Contents
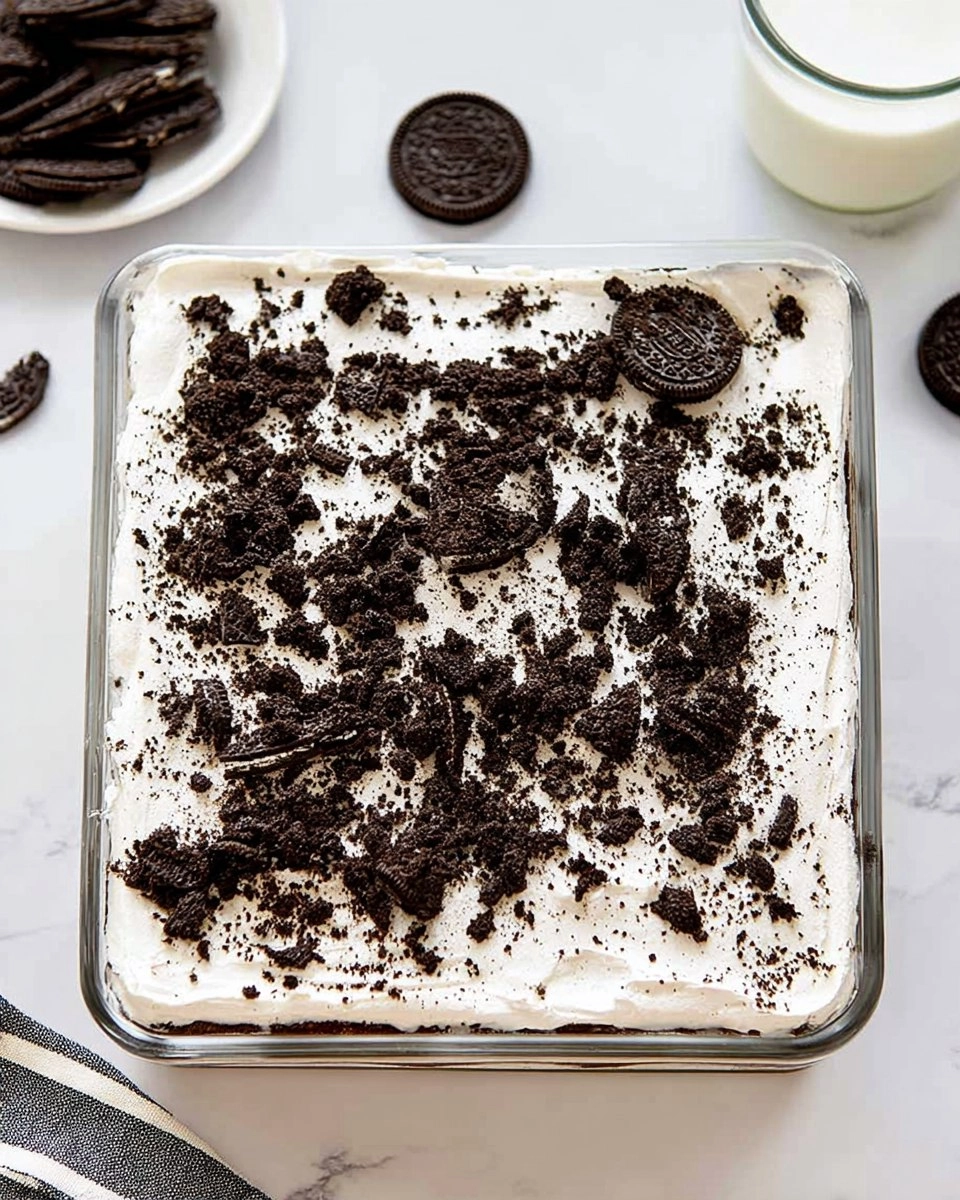
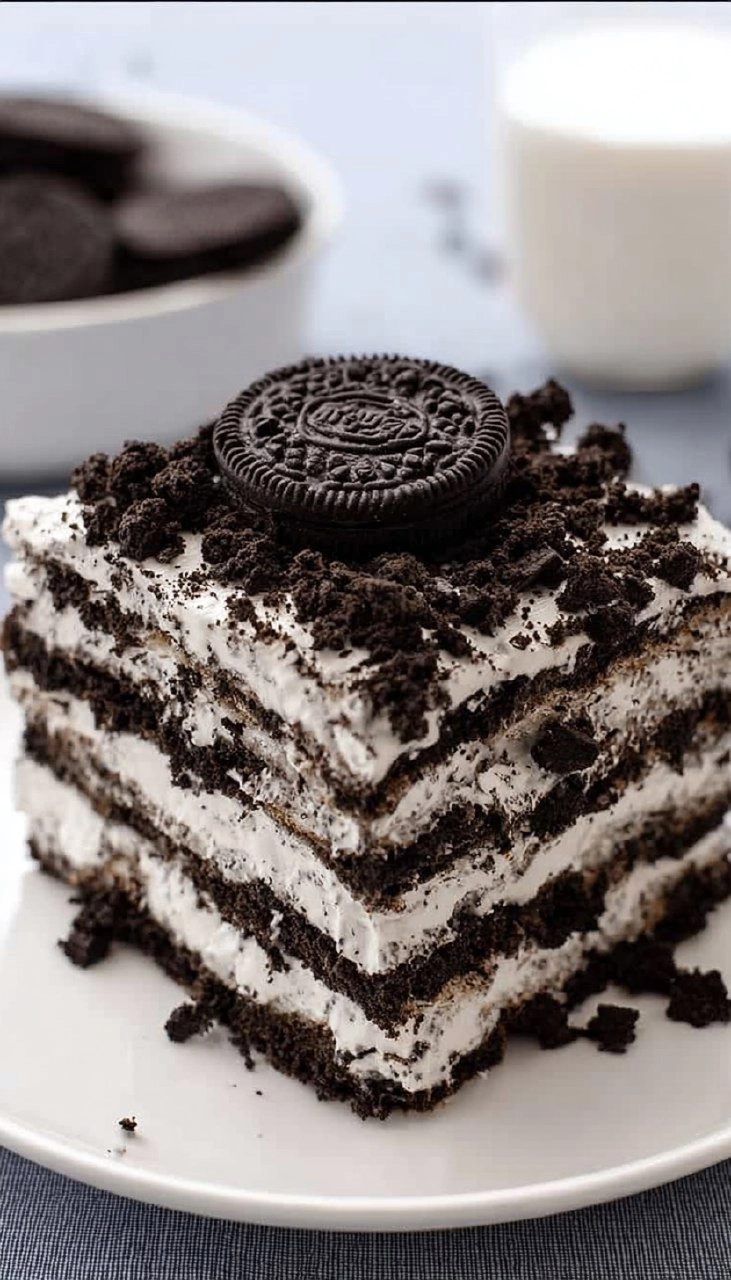
The beauty of this dessert lies not just in its flavor but in how effortlessly it comes together. You don’t need to fire up the oven, which means less mess and an inviting chill in your fridge as it sets. As it chills, the cookies soften, creating a luscious cake-like texture that melts in your mouth. Trust me, once you’ve taken a bite of this Oreo Icebox Cake, you’ll want to make it again and again!
Why You’ll Love This Recipe
- Simple & Quick: You can whip this cake together in no time — no baking required!
- Irresistible Flavor: Rich, creamy layers paired with the classic taste of Oreos will tantalize your taste buds.
- Eye-Catching Appeal: This dessert is not only delicious but it also looks fantastic on any dessert table.
- Flexible Serving: Perfect for any occasion—birthdays, holidays, or just a cozy night in.
- Diet-Friendly Options: Suitable for various diets; simply choose gluten-free Oreos for a gluten-friendly version.
Ingredients You’ll Need
- 48 Oreo cookies: These provide the crunchy layers that also infuse the cake with that classic chocolate flavor. You can substitute with gluten-free Oreos if needed.
- 4 ounces cream cheese, softened: This adds richness and a creamy texture to the whipped filling. Make sure it’s at room temperature for easier blending.
- 2 ½ cups heavy whipping cream, cold: Essential for whipping into stiff peaks, which give the cake its luscious, airy texture.
- ½ cup confectioners’ sugar: This light sweetness balances the flavors wonderfully; granulated sugar can be used, but it might change the texture slightly.
- 1 teaspoon vanilla extract: It rounds out the flavors, making each bite taste delightful. Quality vanilla elevates the overall taste.
- Crushed Oreo cookies: Used for garnish, they add an attractive finish and extra Oreo goodness on top.
How to Make Oreo Icebox Cake
- Chill Your Equipment: Start by placing the bowl of a stand mixer and the whisk attachment in the freezer for about 15 to 20 minutes. This helps the cream whip better and faster.
- Cream the Cheese: In your chilled bowl, beat 4 ounces of cream cheese until smooth. This creates a creamy base for the whipped mixture.
- Whip It Good: Add 2 ½ cups of cold heavy whipping cream, ½ cup of confectioners’ sugar, and 1 teaspoon of vanilla extract. Beat on medium-high speed until stiff peaks form, but be mindful not to overbeat.
- Layer the Base: Spread a thin layer of your whipped cream mixture into the bottom of an 8×8-inch baking dish. This will help the first layer of cookies stick nicely.
- Add the Cookies: Arrange a single layer of 48 Oreo cookies over the whipped cream at the bottom, breaking a few cookies as needed to fit their shape.
- Spread the Cream: Take about one-third of the remaining whipped cream mixture and spread it evenly over the layer of Oreos. This adds a nice creamy layer atop the cookies.
- Repeat Layers: Repeat the layers two more times, finishing with that dreamy layer of whipped cream on top.
- Crush & Chill: Sprinkle the top with crushed Oreo cookies for an inviting look. Cover tightly and refrigerate for at least 6 to 8 hours, or overnight if you can wait. This time allows the flavors to meld, and the cookies to soften into a cake-like texture.
- Serve Cold: Once chilled, for the cleanest slices, you can pop the cake into the freezer for about 20 to 30 minutes before cutting. This makes for beautiful presentation!
Storing & Reheating
Once your Oreo Icebox Cake is made, it can be stored tightly covered in the refrigerator for up to 3 days. If you want to keep it for longer, consider slicing it into portions and freezing them in an airtight container, where it can be kept for up to 3 months. When you’re ready to enjoy it, simply let it thaw in the fridge for a few hours. The texture generally holds up well, but it’s best served chilled to maintain its creamy consistency.
Chef’s Helpful Tips
- Always make sure your cream cheese is softened before blending; this will help avoid lumps in your filling.
- If you find the whipped cream isn’t forming stiff peaks, double-check that your bowl and beaters are completely clean and cool.
- Want to change it up? Try adding different flavors to your whipped cream, like a dash of mint extract for a refreshing twist.
- Keep an eye on the layers towards the end—press the cookies gently to make sure they’re evenly spaced, allowing for a better slice later on.
- This recipe is perfect for making ahead of time, giving you more time to relax and enjoy the big reveal.
The beauty of Oreo Icebox Cake lies not just in its simplicity but in the enjoyment that comes from sharing it with friends and family. Each forkful offers a delightfully creamy experience, setting the stage for conversations and laughter. Feel free to experiment with your layers by adding crushed fruits or different flavored extracts to cater to your taste preferences. Once you see the joy on everyone’s faces as they take that first bite, you’ll know you’ve created something special.
Recipe FAQs
Can I use low-fat cream cheese for this recipe?
You can use low-fat cream cheese, but it may not whip as well as full-fat variety, affecting the texture of the whipped filling. For the best results, stick with regular cream cheese.
Can I make this cake ahead of time?
Absolutely! In fact, Oreo Icebox Cake tastes even better the next day, as the flavors meld together beautifully. Just make sure to store it properly in the fridge and enjoy within three days for the best quality.
Are there any variations I can try?
Definitely! You could layer in different cookies, such as peanut butter Oreos or Mint Oreos, and even add a layer of chocolate pudding or whipped topping for extra flavor. The sky’s the limit!
How do I slice this cake cleanly?
For the cleanest slices, chill the cake in the freezer for 20 to 30 minutes before cutting. This firms it up and makes it easier to handle. If you’re using a sharp knife and wiping it clean between slices, you’ll end up with beautiful pieces!
PrintMore Desserts & Appetizers Recipes
- Orange Cake
- Peach Bundt Cake
- Leprechaun Snack Mix (Sweet & Salty St. Patrick’s Party Mix)
- Homemade Cherry Crisp
- Jalapeno Popper Cucumber Salad
Did You Enjoy Making This Recipe? Please rate this recipe with ⭐⭐⭐⭐⭐ or leave a comment.
📖 Recipe Card
Oreo Icebox Cake
- Prep Time: 15 minutes
- Cook Time: 0 minutes
- Total Time: 15 minutes
- Yield: 9 servings 1x
- Category: Desserts & Appetizers
- Method: No-Bake
- Cuisine: American
Description
This Oreo Icebox Cake combines layers of whipped cream and Oreo cookies for an irresistible treat. It’s easy to prepare and perfect for gatherings!
Ingredients
- 48 oreo cookies
- 4 ounces cream cheese, softened
- 2 ½ cups (595 g) heavy whipping cream, cold
- ½ cup (62.5 g) confectioners' sugar
- 1 teaspoon vanilla extract
- Crushed Oreo cookies
Instructions
- Chill the bowl of a stand mixer with the whisk attachment in the freezer for 15 to 20 minutes.
- Beat the cream cheese in the chilled bowl until smooth. Mix in the heavy whipping cream, confectioners’ sugar, and vanilla extract, beating until stiff peaks form. Avoid overbeating.
- Spread a thin layer of the whipped cream mixture in the bottom of an 8×8-inch baking dish.
- Arrange a layer of Oreo cookies over the whipped cream, breaking cookies as needed to fit.
- Spread one-third of the remaining whipped cream mixture evenly over the cookies.
- Repeat the layering two more times, finishing with a layer of whipped cream.
- Sprinkle crushed Oreo cookies on top.
- Cover tightly and refrigerate for at least 6 to 8 hours, or overnight to soften the cookies.
- Serve cold, and for cleaner slices, freeze the cake for 20 to 30 minutes before cutting.
Notes
Ensure the cream cheese is softened for easier mixing.
For additional flavor, try adding a touch of cocoa powder to the whipped cream mixture.
This dessert can be made a day ahead for best results.
Nutrition
- Serving Size: 1 slice
- Calories: 350
- Sugar: 20g
- Sodium: 150mg
- Fat: 25g
- Saturated Fat: 15g
- Unsaturated Fat: 5g
- Trans Fat: 0g
- Carbohydrates: 30g
- Fiber: 1g
- Protein: 4g
- Cholesterol: 70mg